Millions of people across the country grow their own fruits and vegetables every year. You may be wondering how you can do the same. Did you grow up in the middle of town and never had to grow anything? Or, do you come from a family that provided everything for you from the store so you didn’t have to think about where it came from? Even if those situations aren’t yours you can still enjoy growing your own vegetables and eat healthier because of it. So how do you start? Well buckle up and here we go.
Step 1: Research
So one of the first things you really want to do before you start throwing seeds in the ground is look up what region you’re in. Different regions have different planting seasons. You never want to plant before the last freeze of winter. If temperatures drop below freezing it can kill your seeds and nothing will grow. You also want to do a soil test to make sure the nitrogen levels are where they should be. You can get soil test kits from most garden supply stores for only a couple of dollars. Also each vegetable has different soil nutrient requirements which you should also look up for the plants you want to grow.
Step 2: Prepare
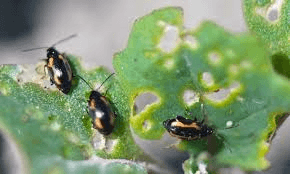
The next thing you should do is begin getting the garden ready to plant. To start with many people put a border around their garden to make it look nicer as well as keep pests out. Things such as fences are usually a good idea especially if you live in the country and have rabbits, rodents, and other garden pests running around. There are a number of things you can do to keep them out, some of which work better than others.
Fence
If you decide to put up a fence then here are some things to think about. Rabbits can dig and they can jump so you will want to put your fence at least 1 ft. under the ground level and at least 3 feet high. So to make it simple take a 4 foot high fence and trench the perimeter of the garden down 1 foot then place the fence into the trench so the bottom of the fence touches the bottom of the trench. Attach the fence to your posts then backfill the trench. You want to make sure that your fence has small enough holes that rabbits and other pests cannot get through it.
Border Stones
Border stones can enhance the visual appeal of your garden quite a bit. The downside is they don’t typically keep pests out. If you have a fenced yard this may be a viable option for you.
Step 3: Fertilize
Once you know what kind of garden you want to grow and have the fence in place the next thing you want to do is fertilize the soil. This will add the nutrients that will allow your plants to thrive. Different plants have different nutritional requirements so this step will vary depending on what you decide to grow. There are a number of ways you can fertilize your new garden. If you have horses, you can compost horse manure. In fact you can compost most anything. If you’re into sustainable living you can put old vegetables, leaves, dead plants etc. into your compost pile to feed your garden. You can buy calf manure as well however, horse manure, if composted property can be gold for your garden. If you live in a rural area and do not have horses you can probably get some from your neighbors who do. Many horse owners are more than happy to have someone come get their manure for them. There are also commercially available fertilizers that you can purchase from garden supply stores. If you decide to use horse manure then read this article where we discuss how to properly compost it so it doesn’t damage your garden. If you decide to fertilize with manure you want to spread it evenly across your garden and till it in with the soil. If you purchase a commercial product then you will want to follow the manufacturer’s directions on how to properly apply it to your garden.
Step 4: Set Up Irrigation
This is an optional step but most people do it so they do not have to run a hose to the garden to water all the time. What I’m doing in my garden this year is running 1-inch PVC with some small holes drilled into it between the rows of plants. Doing this allows me to connect a hose to the end of the pipe using a ball valve and water the garden that way. You can also connect the PVC to an outdoor hose bib if you have one available. But remember you will want to add a way to turn the water on and off for the garden itself. You can place a timer on to the hose bib and connect the hose to that so you can actually have your garden watered without having to go out to do it manually. I picked up a 2 station timer at Wal-Mart for $20. A 2 station timer has 1 input and 2 outputs. These outputs can be set to a different schedule for watering so if you have 2 different gardens you can water them separately automatically.
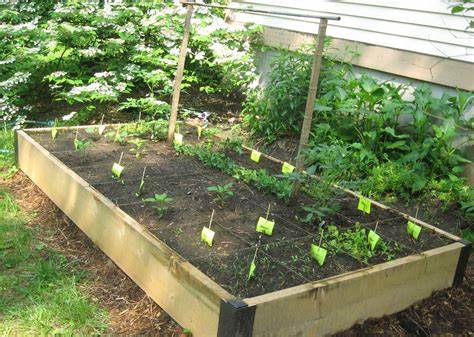
Step 5: Plant
Now that you know what you’re going to plant, the soil is prepared and irrigation is in place the next thing you want to do is get those seeds in the ground. This can be the most rewarding step as the hardest part of the work is over. Each plant will produce multiple vegetables or fruits so you don’t need to go hog wild with seeds. Space each seed out evenly in rows and add some type of sign so you can tell what row contains what plants. You will want to keep testing the soil after you plant to make sure the nutrients are there throughout the growing season. You will also want to ensure that your plants get adequate sunlight and water every day.
Wrap-up
This is just a high level overview of the steps you should follow to get started with your new garden. Each step can be a lot more in depth than this but this is the jest of it. There are still a few things you will have to deal with once you’re planted such as pest control, bird control, etc. but for many people these things aren’t a big problem.
What tips do you have for new gardeners? Let me know in the comments below. Also if you found this article helpful please share it on your favorite social media channels.